
Artificial Intelligence has entered a new era where powerful Large Language Models (LLMs) are no longer exclusive to cloud providers and enterprise-scale infrastructure. In 2026, advancements in open-source AI, LLM model optimization techniques, and affordable high-performance hardware have made it possible for developers, researchers, students, and technology enthusiasts to run sophisticated LLMs directly on their own computers. Whether your goal is to build a private AI assistant, develop offline AI applications, experiment with fine-tuning, or simply eliminate ongoing API costs, running LLMs locally provides unmatched flexibility, privacy, and control.
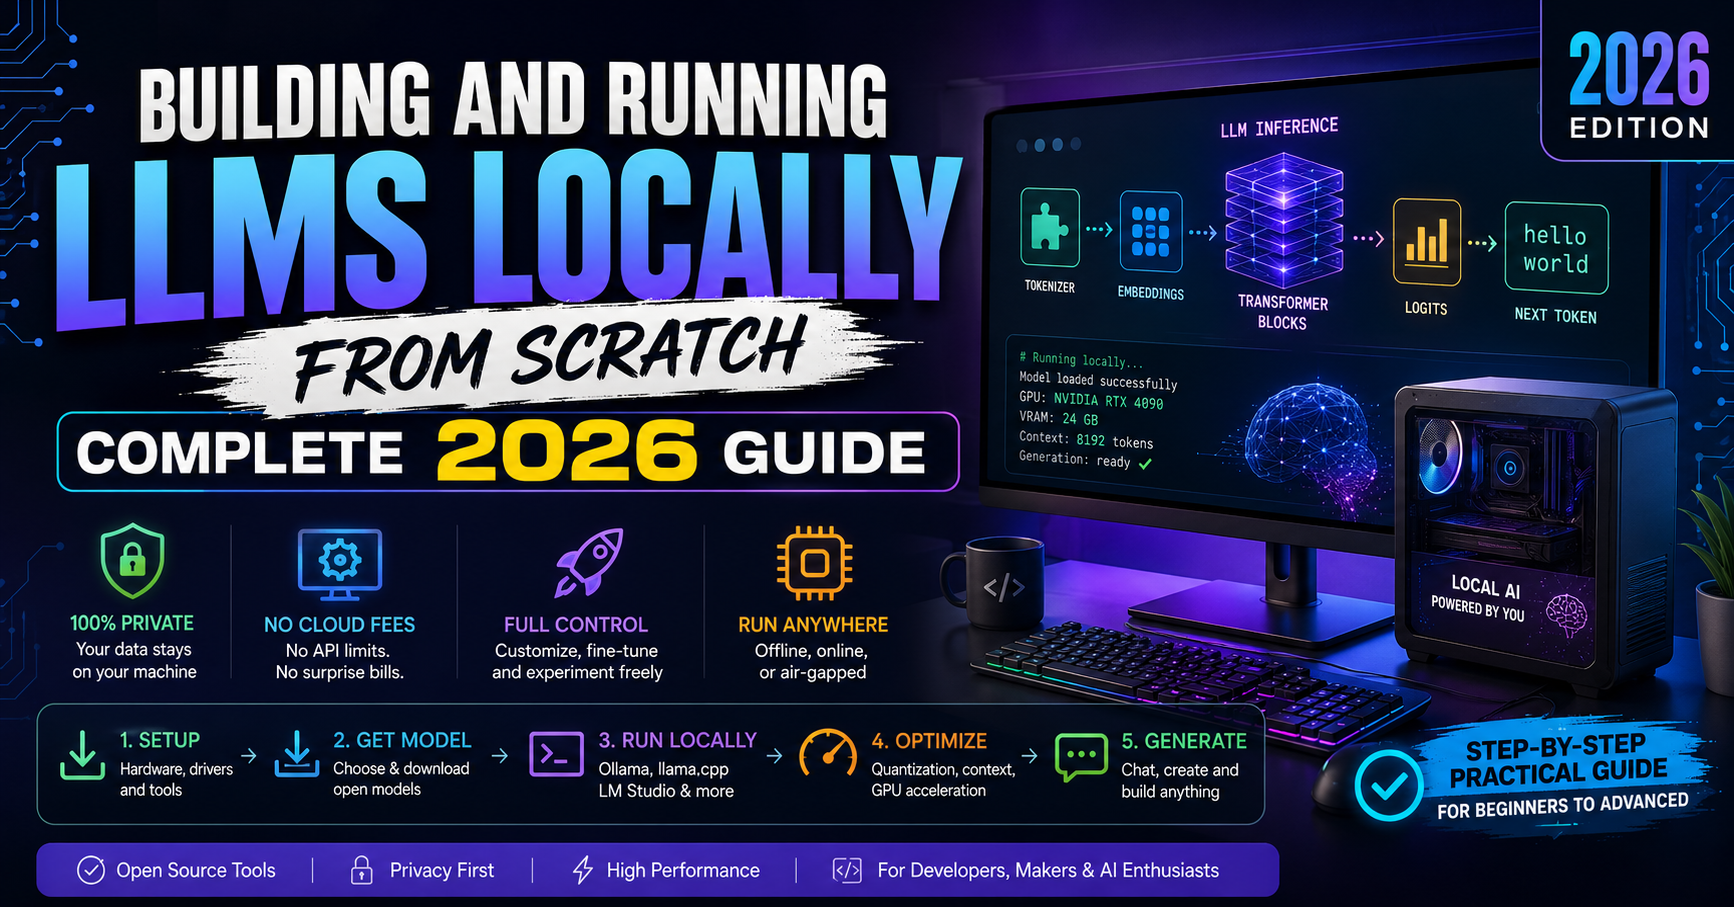
However, setting up a local LLM environment can be overwhelming for beginners due to the wide variety of models, hardware requirements, inference engines, quantization formats, and optimization techniques available today. This comprehensive guide walks you through the complete process of building and running LLMs locally from scratch. You’ll learn how to choose the right hardware, select suitable open-source models, install popular inference frameworks such as Ollama and llama.cpp, optimize performance for your system, and create a reliable local AI setup capable of handling real-world tasks efficiently.
- Introduction – Why Build an LLM Locally?
- What Is a Large Language Model (LLM)?
- Hardware Requirements & Realistic Expectations
- Tokenization: The First and Most Critical Step
- Data Preparation Pipeline
- Transformer Architecture Explained
- Building NanoGPT from Scratch
- Training Loop & Optimization
- Fine-Tuning Pre-Trained Models (Practical Path)
- LoRA: Efficient Fine-Tuning for Limited Hardware
- Running LLMs Locally with Ollama & LM Studio
- Evaluating Your Local LLM
- LLM Size vs Hardware Comparison Table
- Common Mistakes & How to Avoid Them
- Your 4-Week Learning Roadmap
- Frequently Asked Questions
Over 50,000 developers ran their own local LLMs in 2025 — and that number is doubling in 2026 as tools mature and hardware costs fall. Building and running a Large Language Model (LLM) locally from scratch gives you full data privacy, zero API costs, and deep technical understanding that no cloud service can teach you. Whether you have a powerful GPU workstation or just an 8GB RAM laptop with a CPU, this guide gives you a clear, honest, and practical path to build, train, fine-tune, and run your own LLM today.
- Developers and students who want to understand LLMs from the ground up
- Engineers who need to run AI models locally for privacy, learning, or cost reasons
- Researchers building domain-specific language models
- Anyone who has ever asked: “Can I build my own small ChatGPT at home?”, Yes, you can.

Buy the Book in PDF file: Building Local LLMs on Your PC
What Is a Large Language Model (LLM)?
A Large Language Model is a neural network trained on massive text datasets to predict the next token in a sequence. The “large” refers to the number of parameters — learnable weights that encode knowledge about language, facts, reasoning, and style. Modern LLMs range from 125 million parameters (GPT-2 Small) to over 1 trillion parameters (estimated GPT-4 MoE).
The core concept is simple: given a sequence of tokens, the model outputs a probability distribution over the vocabulary — which token comes next? Trained on enough data with enough parameters, this simple objective produces surprisingly powerful emergent abilities like reasoning, coding, translation, and summarization.
- Token: The atomic unit of text the model processes (characters, subwords, or words)
- Parameter: A learnable number inside the neural network (weights and biases)
- Context Window: Maximum number of tokens the model can see at once
- Loss: Cross-entropy — how wrong the model’s predictions are (lower = better)
- Perplexity: exp(loss) — how “surprised” the model is. Lower = more fluent
- Transformer: The neural architecture all modern LLMs use (see Transformer Architecture)
The Three Stages of LLM Development
| Stage | What Happens | Data Needed | Compute Needed | Your Role |
|---|---|---|---|---|
| Pre-training | Train on internet-scale text to learn language | Trillions of tokens | Thousands of GPUs, months | Not practical solo |
| Supervised Fine-Tuning (SFT) | Teach the model to follow instructions | Thousands of Q&A pairs | 1–4 GPUs, hours to days | ✅ Fully achievable |
| Alignment (RLHF/DPO) | Make outputs helpful, safe, and honest | Human preference data | Multiple GPUs, days | Achievable with tools |
Hardware Requirements & Realistic Expectations
Before writing a single line of code, understanding your hardware constraints saves enormous frustration. Your hardware determines what you can build, train, and run. The good news: the barrier has dropped dramatically in 2025–2026. Let’s look at what each setup can realistically achieve.
You can: Build and train NanoGPT (1–10M params) on small datasets, run Ollama with 3B models (quantized), fine-tune DistilGPT-2 with LoRA. Training 5,000 steps on Shakespeare takes ~20–60 minutes.
You can: Train slightly larger NanoGPT variants, run 7B models quantized (Q4) via Ollama/LM Studio, fine-tune GPT-2 Medium. Real usable local LLM experience starts here.
You can: Fine-tune GPT-2, train NanoGPT quickly, run 7B models at good speed, apply LoRA to 7B models. This is the sweet spot for local LLM work.
You can: Fine-tune 7B–13B models with LoRA/QLoRA, run 13B models at full quality, train respectable small models from scratch.
- Training GPT-3 (175B params) from scratch on one RTX 4090 would take approximately 355 years
- Training LLaMA-7B from scratch requires ~180,000 GPU-hours on A100s
- For 8GB RAM + CPU: Build tiny transformers to learn + use Ollama to run — this is the smart path
- Google Colab (free tier) gives you a T4 GPU (15GB VRAM) for free — use it for fine-tuning
| Hardware | Build NanoGPT | Fine-Tune (LoRA) | Run 7B Model | Run 13B Model |
|---|---|---|---|---|
| CPU 8GB RAM | ✅ Yes (slow) | ⚠️ DistilGPT-2 only | ⚠️ Very slow | ❌ No |
| CPU 16GB RAM | ✅ Yes | ✅ GPT-2 Small | ✅ Quantized (Q4) | ⚠️ Slow |
| GPU 8GB VRAM | ✅ Fast | ✅ 7B with QLoRA | ✅ Good speed | ⚠️ Tight |
| GPU 24GB VRAM | ✅ Very fast | ✅ 13B comfortably | ✅ Excellent | ✅ Good |
AI Tutorial 2026





Tokenization: The First and Most Critical Step
Tokenization is where every LLM journey begins. Before a model can process text, it must convert raw strings into numbers. The choice of tokenization strategy directly affects vocabulary size, sequence length, model capacity, and performance on different text types. This is more important than most beginners realize — bad tokenization can cripple a great model. Understanding this deeply is also essential to the data preparation pipeline that follows.
The Three Tokenization Methods
Every unique character is one token. Vocabulary size: ~65–256. Simple to implement, perfect for NanoGPT. Each character gets a unique integer ID. Produces long sequences (1 char = 1 token).
Every word is one token. Vocabulary can be 50,000–500,000+. Suffers from Out-Of-Vocabulary (OOV) problems — unseen words can’t be represented. Rarely used in modern LLMs.
The gold standard. Byte Pair Encoding merges frequent character pairs iteratively. Common words become single tokens; rare words split into subword pieces. Used by GPT-2, GPT-4, LLaMA, Mistral. Vocabulary: ~32,000–100,000 tokens. Best balance of vocabulary size vs sequence length.
Character-Level Tokenizer — Full Implementation
class CharTokenizer:
    """
    Character-level tokenizer — the foundation of NanoGPT.
    Simple, transparent, and perfect for learning.
    """
    def __init__(self):
        self.char_to_int = {}
        self.int_to_char = {}
        self.vocab_size  = 0
        self._fitted     = False

    def fit(self, text: str):
        """Build vocabulary from the entire corpus."""
        chars = sorted(set(text))          # All unique characters
        self.vocab_size   = len(chars)
        self.char_to_int  = {ch: i for i, ch in enumerate(chars)}
        self.int_to_char  = {i: ch for i, ch in enumerate(chars)}
        self._fitted      = True
        print(f"✅ Vocab size: {self.vocab_size} | Sample: {chars[:15]}")
        return self

    def encode(self, text: str) -> list:
        """Text → list of integer token IDs."""
        if not self._fitted:
            raise RuntimeError("Call .fit() first!")
        return [self.char_to_int[ch] for ch in text if ch in self.char_to_int]

    def decode(self, tokens: list) -> str:
        """List of integer token IDs → text."""
        if not self._fitted:
            raise RuntimeError("Call .fit() first!")
        return ''.join([self.int_to_char[i] for i in tokens])

# ── Usage ──────────────────────────────────────────
text = open("shakespeare.txt", "r").read()

tokenizer = CharTokenizer()
tokenizer.fit(text)

sample = "To be or not to be"
tokens = tokenizer.encode(sample)
restored = tokenizer.decode(tokens)

print(f"Original:  '{sample}'")
print(f"Tokens:     {tokens}")
print(f"Restored:  '{restored}'")
print(f"Match:      {sample == restored}")
Using tiktoken (GPT’s Production Tokenizer)
import tiktoken

# GPT-2 tokenizer — BPE on raw bytes
enc = tiktoken.get_encoding("gpt2")

test_cases = [
    "Hello, world!",
    "tokenization is fascinating",
    "def hello_world():",        # Code tokenizes differently
    "unhappiness",               # Subword splitting: un + happiness
    "2024-01-15",                # Numbers can be surprising
]

for text in test_cases:
    tokens = enc.encode(text)
    pieces = [enc.decode([t]) for t in tokens]
    print(f"Text:   '{text}'")
    print(f"Tokens:  {tokens}")
    print(f"Pieces:  {pieces}")
    print(f"Count:   {len(tokens)} tokens")
    print()

print(f"GPT-2 vocabulary size: {enc.n_vocab:,}")
# Output: 50,257 — the famous GPT-2 vocab size
- The word “unhappiness” may be 3 tokens:
["un", "happiness", ""]— rare words cost more tokens - Code, math, and non-English text are often more expensive per character than English prose
- Leading spaces matter:
"Hello"and" Hello"are often different tokens - GPT-2 uses 50,257 tokens. LLaMA-3 uses 128,256 tokens. Larger vocab = more efficiency but larger embedding table
Data Preparation Pipeline
The quality of your training data has a bigger impact on model quality than almost any architectural choice. This is the most undervalued step in LLM development. The pipeline described here mirrors what leading AI labs do — at a scale appropriate for your local setup. Once your data is clean, you can move directly to the NanoGPT build.
“Better data beats bigger models.” A small model trained on clean, high-quality, diverse data will outperform a larger model trained on noisy, repetitive, or toxic data. Filter aggressively.
Step 1: Collect Raw Text
import urllib.request
from pathlib import Path

# Option A: Shakespeare (1MB, great for learning)
shakespeare_url = (
    "https://raw.githubusercontent.com/karpathy/char-rnn/"
    "master/data/tinyshakespeare/input.txt"
)
Path("data").mkdir(exist_ok=True)
urllib.request.urlretrieve(shakespeare_url, "data/shakespeare.txt")
print("✅ Downloaded Shakespeare dataset")

# Option B: Your own domain text (BEST for practical use)
# Place .txt files in data/ folder
# Sources: company docs, books, technical manuals, forum posts

# Option C: HuggingFace datasets (large scale)
# pip install datasets
from datasets import load_dataset
dataset = load_dataset("wikitext", "wikitext-2-raw-v1", split="train")
texts   = dataset["text"]
print(f"WikiText-2: {len(texts):,} documents")
Step 2: Clean & Filter Data
import re
import numpy as np

class TextDataCleaner:
    """
    Production-grade text cleaning pipeline.
    Apply this BEFORE tokenization — garbage in, garbage out.
    """

    def clean_text(self, text: str) -> str:
        """Remove noise, normalize formatting."""
        # Normalize line endings
        text = re.sub(r'\r\n|\r', '\n', text)
        # Collapse excessive whitespace
        text = re.sub(r' {3,}', '  ', text)
        text = re.sub(r'\n{4,}', '\n\n\n', text)
        # Replace URLs and emails with placeholders
        text = re.sub(r'http[s]?://\S+', '<URL>', text)
        text = re.sub(r'\S+@\S+\.\S+', '<EMAIL>', text)
        # Remove control characters
        text = re.sub(r'[\x00-\x08\x0b\x0c\x0e-\x1f\x7f]', '', text)
        # Normalize smart quotes
        text = text.replace('\u201c', '"').replace('\u201d', '"')
        text = text.replace('\u2018', "'").replace('\u2019', "'")
        return text.strip()

    def quality_filter(self, text: str) -> tuple:
        """Return (keep: bool, reason: str)."""
        if len(text) < 100:
            return False, "too_short"
        if len(text) > 1_000_000:
            return False, "too_long"
        # Must be mostly alphabetic
        alpha_ratio = sum(c.isalpha() for c in text) / len(text)
        if alpha_ratio < 0.35:
            return False, "low_alpha_ratio"
        # Detect repetitive spam content
        words = text.split()
        if len(words) > 20:
            unique_ratio = len(set(words)) / len(words)
            if unique_ratio < 0.25:
                return False, "repetitive_content"
        return True, "passed"

    def process(self, documents: list) -> list:
        """Clean and filter a list of raw documents."""
        clean_docs     = []
        filter_reasons = {}

        for doc in documents:
            cleaned      = self.clean_text(doc)
            keep, reason = self.quality_filter(cleaned)
            if keep:
                clean_docs.append(cleaned)
            else:
                filter_reasons[reason] = filter_reasons.get(reason, 0) + 1

        keep_rate = len(clean_docs) / max(len(documents), 1) * 100
        print(f"📊 Processed: {len(documents)} docs | "
              f"Kept: {len(clean_docs)} ({keep_rate:.1f}%)")
        print(f"   Removed reasons: {filter_reasons}")
        return clean_docs
Step 3: Tokenize & Create Training Batches
import numpy as np
import torch

# ── Tokenize the full corpus ───────────────────────────────────────
text = open("data/shakespeare.txt").read()

tokenizer = CharTokenizer()   # From the tokenization section
tokenizer.fit(text)

all_tokens = np.array(tokenizer.encode(text), dtype=np.int64)
print(f"Total tokens: {len(all_tokens):,}")

# ── Train / Validation split (90/10) ──────────────────────────────
n          = int(0.9 * len(all_tokens))
train_data = all_tokens[:n]
val_data   = all_tokens[n:]

print(f"Train: {len(train_data):,} | Val: {len(val_data):,}")

# ── Batch generator ───────────────────────────────────────────────
def get_batch(data, block_size: int, batch_size: int, device: str = 'cpu'):
    """
    Sample random batches for training.

    Each sample:
      x = tokens[i   : i+block_size]   ← model input
      y = tokens[i+1 : i+block_size+1] ← what model must predict

    This "shift by 1" is the entire language modeling objective.
    """
    ix = torch.randint(len(data) - block_size, (batch_size,))
    x  = torch.stack([
        torch.tensor(data[i   : i+block_size], dtype=torch.long) for i in ix
    ])
    y  = torch.stack([
        torch.tensor(data[i+1 : i+block_size+1], dtype=torch.long) for i in ix
    ])
    return x.to(device), y.to(device)

# Quick test
x, y = get_batch(train_data, block_size=64, batch_size=4)
print(f"Batch shapes — x: {x.shape}, y: {y.shape}")
print(f"x[0][:10]: {x[0][:10].tolist()}")
print(f"y[0][:10]: {y[0][:10].tolist()}")  # y is x shifted right by 1
- ☑ Raw text collected and verified (no corrupt files)
- ☑ Text cleaned (whitespace, encoding, URLs normalized)
- ☑ Quality filtered (removed short, repetitive, low-alpha docs)
- ☑ Tokenizer fitted on the full corpus
- ☑ 90% / 10% train-validation split applied
- ☑ Batch generator tested and producing correct shapes
Transformer Architecture Explained
Every modern LLM — GPT-4, LLaMA 3, Mistral, Claude — uses the Transformer architecture introduced in the 2017 paper “Attention Is All You Need”. Understanding it at the component level is what separates developers who can truly build and debug LLMs from those who just call APIs. Here is the full architecture, layer by layer.
Tokens → Token Embedding + Positional Embedding → N × Transformer Block → LayerNorm → Linear → Logits → Softmax → ProbabilitiesComponent 1: Embeddings
Two embedding tables are added together:
- Token Embedding: Maps each token ID to a dense vector of size
n_embd. The model learns what each token “means”. - Positional Embedding: Maps each position (0, 1, 2 … T) to a vector. Transformers are permutation-invariant — without this, they can’t distinguish “dog bites man” from “man bites dog”.
Component 2: Scaled Dot-Product Attention (The Core)
Attention(Q, K, V) = softmax(QKT / √dk) × V
- Q (Query): “What am I looking for?” — a projection of the current token
- K (Key): “What do I contain?” — a projection of every other token
- V (Value): “What do I actually say?” — the information to be retrieved
- √dk scaling: Prevents softmax from saturating for large embedding dimensions
- Causal mask: Zeros out future positions so generation is autoregressive
Component 3: Multi-Head Attention
Run n_head independent attention operations in parallel. Each head learns to attend to different relationship types (syntax, semantics, coreference, position). Outputs are concatenated and linearly projected back to n_embd.
Component 4: Feed-Forward Network (FFN)
Applied position-wise (same weights, independent at each position):
FFN(x) = GELU(xW₁ + b₁)W₂ + b₂
Standard size: input n_embd → hidden 4 × n_embd → output n_embd. This is where the model “thinks” — the attention mechanism identifies which tokens are relevant; the FFN processes that information.
Component 5: Residual Connections & LayerNorm
Each sub-layer (attention + FFN) has a skip connection: x = x + Sublayer(LayerNorm(x))
- Residual: Lets gradients flow directly from output to input — critical for training depth
- Pre-LayerNorm: Normalizing before the sublayer (modern GPT style) is more stable than post-norm (original paper)
| Component | Input Shape | Output Shape | Purpose |
|---|---|---|---|
| Token Embedding | (B, T) | (B, T, n_embd) | Token ID → dense vector |
| Positional Embedding | (T,) | (B, T, n_embd) | Add position information |
| Single Attention Head | (B, T, n_embd) | (B, T, head_size) | Attend to relevant positions |
| Multi-Head Attention | (B, T, n_embd) | (B, T, n_embd) | Parallel multi-perspective attention |
| Feed-Forward Network | (B, T, n_embd) | (B, T, n_embd) | Non-linear transformation per position |
| LM Head (output) | (B, T, n_embd) | (B, T, vocab_size) | Predict next token logits |
Building NanoGPT from Scratch
NanoGPT is the cleanest, most educational implementation of a GPT-style model available. Originally created by Andrej Karpathy, this section builds it from scratch with every detail explained. Once you understand this, you understand every LLM that exists today. Make sure your data is prepared and your tokenizer is fitted before running training.
import math
import torch
import torch.nn as nn
import torch.nn.functional as F
from dataclasses import dataclass


# ─── Configuration ─────────────────────────────────────────────────────
@dataclass
class GPTConfig:
    vocab_size : int   = 65     # Unique tokens (65 for Shakespeare char-level)
    block_size : int   = 256    # Context window length
    n_embd     : int   = 384    # Embedding / hidden dimension
    n_head     : int   = 6      # Number of attention heads
    n_layer    : int   = 6      # Number of transformer blocks
    dropout    : float = 0.2    # Dropout probability

    def __post_init__(self):
        assert self.n_embd % self.n_head == 0, \
            "n_embd must be divisible by n_head"
        head_size = self.n_embd // self.n_head
        # Rough parameter estimate
        params = (
            self.vocab_size * self.n_embd +          # token embedding
            self.block_size * self.n_embd +          # position embedding
            self.n_layer * (
                4 * self.n_embd * self.n_embd +      # attention (Q,K,V,proj)
                2 * self.n_embd * 4 * self.n_embd +  # FFN
                4 * self.n_embd                      # LayerNorm params
            ) +
            self.n_embd * self.vocab_size            # output head
        )
        print(f"Config ready | ~{params/1e6:.2f}M parameters")


# ─── Attention Head ────────────────────────────────────────────────────
class AttentionHead(nn.Module):
    """Single causal self-attention head."""

    def __init__(self, cfg: GPTConfig):
        super().__init__()
        hs = cfg.n_embd // cfg.n_head
        self.key   = nn.Linear(cfg.n_embd, hs, bias=False)
        self.query = nn.Linear(cfg.n_embd, hs, bias=False)
        self.value = nn.Linear(cfg.n_embd, hs, bias=False)
        # Causal mask registered as non-parameter buffer
        self.register_buffer(
            'tril',
            torch.tril(torch.ones(cfg.block_size, cfg.block_size))
        )
        self.dropout = nn.Dropout(cfg.dropout)
        self.hs = hs

    def forward(self, x):
        B, T, C = x.shape
        q = self.query(x)   # (B, T, hs)
        k = self.key(x)     # (B, T, hs)
        v = self.value(x)   # (B, T, hs)

        # Scaled dot-product attention
        scores = q @ k.transpose(-2, -1) * (self.hs ** -0.5)  # (B, T, T)
        # Mask future positions → -inf → 0 after softmax
        scores = scores.masked_fill(
            self.tril[:T, :T] == 0, float('-inf')
        )
        weights = F.softmax(scores, dim=-1)
        weights = self.dropout(weights)
        return weights @ v  # (B, T, hs)


# ─── Multi-Head Attention ──────────────────────────────────────────────
class MultiHeadAttention(nn.Module):
    def __init__(self, cfg: GPTConfig):
        super().__init__()
        self.heads   = nn.ModuleList([AttentionHead(cfg) for _ in range(cfg.n_head)])
        self.proj    = nn.Linear(cfg.n_embd, cfg.n_embd)
        self.dropout = nn.Dropout(cfg.dropout)

    def forward(self, x):
        # Each head: (B, T, hs) → concat → (B, T, n_embd)
        out = torch.cat([h(x) for h in self.heads], dim=-1)
        return self.dropout(self.proj(out))


# ─── Feed-Forward Network ──────────────────────────────────────────────
class FeedForward(nn.Module):
    def __init__(self, cfg: GPTConfig):
        super().__init__()
        self.net = nn.Sequential(
            nn.Linear(cfg.n_embd, 4 * cfg.n_embd),
            nn.GELU(),
            nn.Linear(4 * cfg.n_embd, cfg.n_embd),
            nn.Dropout(cfg.dropout),
        )

    def forward(self, x):
        return self.net(x)


# ─── Transformer Block ─────────────────────────────────────────────────
class Block(nn.Module):
    """Pre-norm Transformer block: LN → Attention → residual → LN → FFN → residual"""

    def __init__(self, cfg: GPTConfig):
        super().__init__()
        self.ln1  = nn.LayerNorm(cfg.n_embd)
        self.attn = MultiHeadAttention(cfg)
        self.ln2  = nn.LayerNorm(cfg.n_embd)
        self.ffn  = FeedForward(cfg)

    def forward(self, x):
        x = x + self.attn(self.ln1(x))   # Attention sub-layer + residual
        x = x + self.ffn(self.ln2(x))    # FFN sub-layer + residual
        return x


# ─── NanoGPT Model ─────────────────────────────────────────────────────
class NanoGPT(nn.Module):
    def __init__(self, cfg: GPTConfig):
        super().__init__()
        self.cfg = cfg
        self.transformer = nn.ModuleDict({
            'tok_emb' : nn.Embedding(cfg.vocab_size, cfg.n_embd),
            'pos_emb' : nn.Embedding(cfg.block_size, cfg.n_embd),
            'drop'    : nn.Dropout(cfg.dropout),
            'blocks'  : nn.ModuleList([Block(cfg) for _ in range(cfg.n_layer)]),
            'ln_f'    : nn.LayerNorm(cfg.n_embd),
        })
        self.lm_head = nn.Linear(cfg.n_embd, cfg.vocab_size, bias=False)
        # Weight tying: token embedding and output head share weights
        # Reduces parameters; semantically similar tokens get similar embeddings
        self.transformer['tok_emb'].weight = self.lm_head.weight
        self.apply(self._init_weights)
        total = sum(p.numel() for p in self.parameters())
        print(f"NanoGPT ready | {total:,} parameters")

    def _init_weights(self, module):
        if isinstance(module, nn.Linear):
            nn.init.normal_(module.weight, mean=0.0, std=0.02)
            if module.bias is not None:
                nn.init.zeros_(module.bias)
        elif isinstance(module, nn.Embedding):
            nn.init.normal_(module.weight, mean=0.0, std=0.02)

    def forward(self, idx, targets=None):
        B, T = idx.shape
        # Token + position embeddings
        tok = self.transformer['tok_emb'](idx)                          # (B, T, n_embd)
        pos = self.transformer['pos_emb'](torch.arange(T, device=idx.device))  # (T, n_embd)
        x   = self.transformer['drop'](tok + pos)
        # Transformer blocks
        for block in self.transformer['blocks']:
            x = block(x)
        x = self.transformer['ln_f'](x)
        logits = self.lm_head(x)   # (B, T, vocab_size)
        # Compute cross-entropy loss if targets provided
        loss = None
        if targets is not None:
            B, T, V = logits.shape
            loss = F.cross_entropy(logits.view(B*T, V), targets.view(B*T))
        return logits, loss

    @torch.no_grad()
    def generate(self, idx, max_new_tokens: int,
                 temperature: float = 1.0, top_k: int = None):
        """Autoregressive text generation."""
        self.eval()
        for _ in range(max_new_tokens):
            idx_cond = idx[:, -self.cfg.block_size:]
            logits, _ = self(idx_cond)
            logits     = logits[:, -1, :] / temperature   # Next-token logits
            if top_k is not None:
                v, _    = torch.topk(logits, min(top_k, logits.size(-1)))
                logits  = logits.masked_fill(logits < v[:, -1:], float('-inf'))
            probs      = F.softmax(logits, dim=-1)
            next_token = torch.multinomial(probs, num_samples=1)
            idx        = torch.cat([idx, next_token], dim=1)
        return idx

    def num_params(self):
        return sum(p.numel() for p in self.parameters())


# ─── Quick test ────────────────────────────────────────────────────────
if __name__ == "__main__":
    cfg   = GPTConfig(vocab_size=65, block_size=32, n_embd=64, n_head=4, n_layer=2)
    model = NanoGPT(cfg)
    x     = torch.randint(0, 65, (2, 16))
    y     = torch.randint(0, 65, (2, 16))
    logits, loss = model(x, y)
    print(f"Logits: {logits.shape} | Loss: {loss.item():.4f}")
    print(f"Expected random loss: {math.log(65):.4f}")  # ln(vocab_size)
Training Loop & Optimization
A well-designed training loop separates models that converge cleanly from those that diverge or plateau early. The practices below — cosine LR schedule, gradient clipping, AdamW with decoupled weight decay, and periodic evaluation — are used in GPT-3, LLaMA, and every serious LLM training run. They apply equally to your NanoGPT and to large-scale fine-tuning.
import time, math
import numpy as np
import torch

# ─── Cosine LR Schedule with Warmup ────────────────────────────────────
def get_lr(step: int,
           peak_lr: float  = 3e-4,
           min_lr:  float  = 3e-5,
           warmup:  int    = 200,
           decay:   int    = 5000) -> float:
    """
    Standard cosine decay with linear warmup.
    Phase 1 (0→warmup): linear ramp — avoids large unstable updates at start
    Phase 2 (warmup→decay): cosine decay — smooth LR reduction
    Phase 3 (decay→∞): constant min_lr
    """
    if step < warmup:
        return peak_lr * (step / warmup)
    if step > decay:
        return min_lr
    progress = (step - warmup) / (decay - warmup)
    coeff    = 0.5 * (1.0 + math.cos(math.pi * progress))
    return min_lr + coeff * (peak_lr - min_lr)


# ─── Optimizer with Decoupled Weight Decay ──────────────────────────────
def configure_optimizer(model, lr: float = 3e-4, weight_decay: float = 0.1):
    """
    Apply weight decay ONLY to 2D+ weight matrices.
    Never to: biases, LayerNorm weights/biases, embeddings (optional).
    This follows AdamW paper best practice.
    """
    decay_params    = [p for n, p in model.named_parameters()
                       if p.requires_grad and p.dim() >= 2]
    no_decay_params = [p for n, p in model.named_parameters()
                       if p.requires_grad and p.dim() < 2]
    groups = [
        {'params': decay_params,    'weight_decay': weight_decay},
        {'params': no_decay_params, 'weight_decay': 0.0},
    ]
    print(f"Decay params: {sum(p.numel() for p in decay_params):,}")
    print(f"No-decay params: {sum(p.numel() for p in no_decay_params):,}")
    return torch.optim.AdamW(groups, lr=lr, betas=(0.9, 0.95), eps=1e-8)


# ─── Evaluation ────────────────────────────────────────────────────────
@torch.no_grad()
def estimate_loss(model, train_data, val_data,
                  block_size, batch_size, eval_iters=50, device='cpu'):
    """
    Average loss over multiple batches for stable estimates.
    MUST call model.eval() to disable dropout.
    """
    model.eval()
    out = {}
    for split, data in [('train', train_data), ('val', val_data)]:
        losses = []
        for _ in range(eval_iters):
            x, y = get_batch(data, block_size, batch_size, device)
            _, loss = model(x, y)
            losses.append(loss.item())
        out[split] = np.mean(losses)
    model.train()
    return out


# ─── Complete Training Loop ────────────────────────────────────────────
def train(model, train_data, val_data, tokenizer,
          max_iters=5000, batch_size=16, block_size=256, device='cpu'):

    model     = model.to(device)
    optimizer = configure_optimizer(model)
    t0        = time.time()
    best_val  = float('inf')

    print(f"\n{'='*55}")
    print(f"  Training NanoGPT for {max_iters} iterations")
    print(f"  Device: {device} | Batch: {batch_size} | Block: {block_size}")
    print(f"{'='*55}\n")

    for step in range(max_iters + 1):

        # ── Evaluation every 500 steps ────────────────────────────
        if step % 500 == 0:
            losses = estimate_loss(
                model, train_data, val_data, block_size, batch_size,
                device=device
            )
            elapsed = time.time() - t0
            print(f"Step {step:5d} | "
                  f"train loss: {losses['train']:.4f} | "
                  f"val loss:   {losses['val']:.4f} | "
                  f"ppl: {math.exp(losses['val']):.1f} | "
                  f"time: {elapsed:.0f}s")

            if losses['val'] < best_val:
                best_val = losses['val']
                torch.save(model.state_dict(), "checkpoints/best_model.pt")
                print(f"  ⭐ New best saved (val loss: {best_val:.4f})")

        # ── Training step ─────────────────────────────────────────
        x, y = get_batch(train_data, block_size, batch_size, device)

        # Update learning rate for this step
        lr = get_lr(step)
        for group in optimizer.param_groups:
            group['lr'] = lr

        # Forward → loss → backward → clip → update
        _, loss = model(x, y)
        optimizer.zero_grad(set_to_none=True)  # set_to_none=True is faster
        loss.backward()
        # Gradient clipping — prevents explosive gradients
        torch.nn.utils.clip_grad_norm_(model.parameters(), 1.0)
        optimizer.step()

    print(f"\n✅ Training complete | Best val loss: {best_val:.4f} | "
          f"Perplexity: {math.exp(best_val):.2f}")

    # ── Generate sample text ──────────────────────────────────────
    model.eval()
    context = torch.zeros((1, 1), dtype=torch.long, device=device)
    tokens  = model.generate(context, max_new_tokens=200, temperature=0.8, top_k=40)
    print("\n📝 Generated sample:\n")
    print(tokenizer.decode(tokens[0].tolist()))
- CPU (i5/i7): 30–90 minutes
- CPU (M1/M2 Mac): 15–40 minutes
- GPU (RTX 3060): 3–8 minutes
- GPU (RTX 4090): Under 2 minutes
- Google Colab T4: 5–12 minutes (free!)
Fine-Tuning Pre-Trained Models (Practical Path)
Fine-tuning is the most practical path for anyone who wants a useful, domain-specific LLM without the resources to pre-train from scratch. You take a model that already knows language — DistilGPT-2, GPT-2, OPT-125M — and teach it your specific task, style, or knowledge domain in hours instead of months. This is the foundation of almost every real-world LLM application. For even more efficiency, see LoRA fine-tuning next.
from transformers import (
    AutoTokenizer,
    AutoModelForCausalLM,
    TrainingArguments,
    Trainer,
    DataCollatorForLanguageModeling,
)
from datasets import Dataset

# ─── Step 1: Load base model ────────────────────────────────────────────
# Choose based on your hardware (see hardware table)
# distilgpt2   → 82M params  → CPU-friendly
# gpt2         → 117M params → good balance
# gpt2-medium  → 345M params → needs GPU
model_name = "distilgpt2"

tokenizer = AutoTokenizer.from_pretrained(model_name)
model     = AutoModelForCausalLM.from_pretrained(model_name)

tokenizer.pad_token = tokenizer.eos_token
model.config.pad_token_id = model.config.eos_token_id

print(f"Base model: {model_name}")
print(f"Parameters: {sum(p.numel() for p in model.parameters())/1e6:.1f}M")

# ─── Step 2: Your custom training data ─────────────────────────────────
# Format: instruction + response pairs (best for chat/QA tasks)
# Or: just raw text for style/domain fine-tuning
custom_data = [
    "Q: What is tokenization?\nA: Tokenization converts raw text into "
    "numerical tokens that language models can process. Methods include "
    "character-level, word-level, and BPE subword tokenization.\n",

    "Q: How does attention work?\nA: Attention computes weighted sums of "
    "value vectors, where weights are determined by query-key similarity. "
    "It allows each token to gather information from all other tokens.\n",

    "Q: What is a transformer?\nA: A transformer is a neural network "
    "architecture based on self-attention mechanisms, introduced in the "
    "'Attention is All You Need' paper (2017). It is the foundation of "
    "all modern LLMs including GPT, LLaMA, and Mistral.\n",

    "Q: What is fine-tuning?\nA: Fine-tuning adapts a pre-trained model "
    "to a specific task or domain by continuing training on a smaller "
    "targeted dataset. It requires far less compute than training from scratch.\n",
]

# ─── Step 3: Tokenize ───────────────────────────────────────────────────
def tokenize_fn(examples):
    result          = tokenizer(
        examples["text"],
        truncation=True, max_length=256, padding="max_length"
    )
    result["labels"] = result["input_ids"].copy()  # CLM: labels = inputs
    return result

dataset     = Dataset.from_dict({"text": custom_data})
tokenized   = dataset.map(tokenize_fn, batched=True, remove_columns=["text"])
split       = tokenized.train_test_split(test_size=0.2)

print(f"Train: {len(split['train'])} | Eval: {len(split['test'])}")

# ─── Step 4: Training arguments ─────────────────────────────────────────
args = TrainingArguments(
    output_dir                  = "./finetuned_gpt2",
    num_train_epochs            = 5,
    per_device_train_batch_size = 2,
    per_device_eval_batch_size  = 2,
    gradient_accumulation_steps = 4,      # Effective batch = 8
    learning_rate               = 2e-5,   # Small LR — model already learned language
    lr_scheduler_type           = "cosine",
    warmup_steps                = 50,
    evaluation_strategy         = "epoch",
    save_strategy               = "epoch",
    load_best_model_at_end      = True,
    metric_for_best_model       = "eval_loss",
    logging_steps               = 10,
    fp16                        = False,  # CPU only — set True for GPU
    dataloader_num_workers      = 0,
    report_to                   = None,
)

# ─── Step 5: Train ──────────────────────────────────────────────────────
trainer = Trainer(
    model         = model,
    args          = args,
    train_dataset = split["train"],
    eval_dataset  = split["test"],
    tokenizer     = tokenizer,
    data_collator = DataCollatorForLanguageModeling(tokenizer, mlm=False),
)

trainer.train()
trainer.save_model("./finetuned_gpt2/final")
tokenizer.save_pretrained("./finetuned_gpt2/final")
print("✅ Fine-tuned model saved!")
LoRA: Efficient Fine-Tuning for Limited Hardware
Low-Rank Adaptation (LoRA) is the most important technique in practical LLM development today. It makes fine-tuning 7B+ parameter models possible on consumer hardware by adding tiny trainable matrices while keeping the original model frozen. Combined with quantization (QLoRA), you can fine-tune a 7B model on a single 8GB GPU. This pairs perfectly with the standard fine-tuning workflow above.
Instead of updating W (d×d = millions of params), add trainable ΔW = BA where B is d×r and A is r×d, with rank r << d.
With r=8 and d=768: Original 589,824 params → LoRA 12,288 params = 48× reduction!
# pip install peft
from peft import LoraConfig, get_peft_model, TaskType
from transformers import AutoModelForCausalLM, AutoTokenizer

# Load base model
model_name = "distilgpt2"
tokenizer  = AutoTokenizer.from_pretrained(model_name)
model      = AutoModelForCausalLM.from_pretrained(model_name)

# LoRA configuration
lora_config = LoraConfig(
    task_type      = TaskType.CAUSAL_LM,
    # Which layers to adapt (GPT-2 attention projections)
    target_modules = ["c_attn", "c_proj"],
    r              = 8,       # Rank: lower = fewer params, less capacity
    lora_alpha     = 16,      # Scaling: alpha/r = 2 → standard starting point
    lora_dropout   = 0.1,
    bias           = "none",
)

# Apply LoRA
lora_model = get_peft_model(model, lora_config)

# Show efficiency
total     = sum(p.numel() for p in lora_model.parameters())
trainable = sum(p.numel() for p in lora_model.parameters() if p.requires_grad)
print(f"Total parameters:     {total:,}")
print(f"Trainable parameters: {trainable:,}")
print(f"Trainable %:          {trainable/total*100:.2f}%")
print(f"Reduction:            {total//trainable}× fewer params to update!")

lora_model.print_trainable_parameters()
# Now pass lora_model to the Trainer from the fine-tuning section


# ─── LoRA Math from Scratch (Educational) ──────────────────────────────
class LoRALinear(nn.Module):
    """
    Wraps a frozen Linear layer with trainable LoRA matrices.
    Forward: y = W @ x  +  (B @ A) @ x * (alpha/r)
    """
    def __init__(self, linear: nn.Linear, r: int = 8, alpha: float = 16.0):
        super().__init__()
        d_out, d_in     = linear.weight.shape
        self.linear     = linear
        self.scaling    = alpha / r
        # Freeze original weights
        self.linear.weight.requires_grad = False
        # LoRA matrices
        self.lora_A = nn.Parameter(torch.randn(r, d_in) * 0.01)  # Random
        self.lora_B = nn.Parameter(torch.zeros(d_out, r))         # Zero → ΔW=0 at start

    def forward(self, x):
        frozen_out = self.linear(x)
        lora_out   = (x @ self.lora_A.T) @ self.lora_B.T * self.scaling
        return frozen_out + lora_out
| Rank (r) | Trainable Params | Use Case |
|---|---|---|
| r = 4 | Very few | Style transfer, simple adaptation |
| r = 8 | Default sweet spot | Most fine-tuning tasks |
| r = 16 | Moderate | Complex domain adaptation |
| r = 32–64 | More capacity | Near full fine-tune quality |
Running LLMs Locally with Ollama & LM Studio
If your goal is to use a capable LLM locally rather than build one from scratch, Ollama and LM Studio are the fastest paths available in 2026. These tools download quantized models (4-bit, 8-bit) and handle all the complexity of running them on your hardware. On 8GB RAM, you can run a 3B model conversationally. On 16GB, the 7B models work well. This complements everything in the NanoGPT and fine-tuning sections as a practical deployment layer.
Install from ollama.ai. Works on Mac, Linux, Windows. Runs in terminal.
# Install Ollama (Linux/Mac)
curl -fsSL https://ollama.ai/install.sh | sh

# Pull and run models
ollama run llama3.2:3b          # 3B params ~2GB — good for 8GB RAM
ollama run llama3.2:7b          # 7B params ~4GB — needs 16GB RAM
ollama run mistral:7b           # Mistral 7B — excellent coding model
ollama run phi3:mini            # Microsoft Phi-3 Mini — very capable at 3.8B
ollama run qwen2.5-coder:7b    # Best for code tasks

# Use Ollama as an API (compatible with OpenAI API format)
curl http://localhost:11434/api/generate \
  -d '{
    "model": "llama3.2:3b",
    "prompt": "Explain tokenization in simple terms.",
    "stream": false
  }'
# Python integration with Ollama
import requests
import json

def chat_local(prompt: str, model: str = "llama3.2:3b") -> str:
    """Talk to your local Ollama model from Python."""
    response = requests.post(
        "http://localhost:11434/api/generate",
        json={"model": model, "prompt": prompt, "stream": False}
    )
    return response.json()["response"]

# Test it
answer = chat_local("What is the difference between fine-tuning and RAG?")
print(answer)

# Or use OpenAI-compatible library
from openai import OpenAI

client = OpenAI(base_url="http://localhost:11434/v1", api_key="ollama")

response = client.chat.completions.create(
    model="llama3.2:3b",
    messages=[
        {"role": "system", "content": "You are a helpful AI assistant."},
        {"role": "user",   "content": "Explain transformers simply."},
    ]
)
print(response.choices[0].message.content)
Download from lmstudio.ai. GUI-based model browser and chat interface. Search and download any GGUF model from HuggingFace. Built-in OpenAI-compatible local server.
| Tool | Interface | Best For | API? | Model Format |
|---|---|---|---|---|
| Ollama | CLI | Developers, scripting | ✅ Yes | Custom |
| LM Studio | GUI | Beginners, exploration | ✅ Yes | GGUF |
| Jan.ai | GUI | Chat-first UX | ✅ Yes | GGUF |
| llama.cpp | CLI | Maximum performance | ✅ Yes | GGUF |
Evaluating Your Local LLM
Training a model without evaluating it properly is like cooking without tasting. Evaluation tells you whether your model is improving, overfitting, or ready for use. Combine automatic metrics with qualitative generation checks for a complete picture. These evaluation practices apply to both your NanoGPT and any fine-tuned model.
import math
import torch
import numpy as np

def evaluate_model(model, tokenizer, val_data, block_size, batch_size=16,
                   n_batches=50, device='cpu'):
    """
    Comprehensive model evaluation:
    - Cross-entropy loss
    - Perplexity (exp(loss))
    - Bits-per-character (for char-level models)
    """
    model.eval()
    losses = []

    with torch.no_grad():
        for _ in range(n_batches):
            x, y = get_batch(val_data, block_size, batch_size, device)
            _, loss = model(x, y)
            losses.append(loss.item())

    avg_loss    = np.mean(losses)
    perplexity  = math.exp(avg_loss)
    bpc         = avg_loss / math.log(2)  # Bits-per-character

    print(f"\n📊 Evaluation Results:")
    print(f"   Cross-entropy loss: {avg_loss:.4f}")
    print(f"   Perplexity:         {perplexity:.2f}")
    print(f"   Bits-per-char:      {bpc:.4f}")

    # Interpretation
    vocab_size = model.cfg.vocab_size
    random_loss = math.log(vocab_size)
    improvement = (random_loss - avg_loss) / random_loss * 100
    print(f"\n   Random baseline loss: {random_loss:.4f}")
    print(f"   Improvement vs random: {improvement:.1f}%")

    model.train()
    return avg_loss, perplexity


# ─── Generation Quality Check ──────────────────────────────────────────
def generation_quality_check(model, tokenizer, prompts, device='cpu',
                              temperature=0.8, top_k=40, max_tokens=100):
    """
    Qualitative assessment — the most important evaluation.
    Look for: coherence, grammar, domain knowledge, diversity.
    """
    model.eval()
    print("\n📝 Generation Quality Samples:")
    print("=" * 55)

    for prompt in prompts:
        tokens = tokenizer.encode(prompt)
        idx    = torch.tensor([tokens], dtype=torch.long, device=device)

        with torch.no_grad():
            generated = model.generate(
                idx, max_new_tokens=max_tokens,
                temperature=temperature, top_k=top_k
            )

        output = tokenizer.decode(generated[0].tolist())
        print(f"\nPrompt: '{prompt}'")
        print(f"Output: {output}")
        print("-" * 40)

    model.train()


# ─── Overfitting Detector ──────────────────────────────────────────────
def check_overfitting(train_losses: list, val_losses: list,
                      threshold: float = 0.3) -> bool:
    """
    Detect overfitting: val loss rising while train loss falls.
    Returns True if overfitting detected.
    """
    if len(val_losses) < 3:
        return False

    recent_val_trend   = val_losses[-1] - val_losses[-3]
    recent_train_trend = train_losses[-1] - train_losses[-3]

    if recent_val_trend > threshold and recent_train_trend < 0:
        print(f"⚠️  Overfitting detected!")
        print(f"   Val loss increasing:   +{recent_val_trend:.4f}")
        print(f"   Train loss decreasing: {recent_train_trend:.4f}")
        print("   Consider: more dropout, less data, or early stopping")
        return True
    return False
- Start (untrained): Loss ≈ 4.17 (= ln(65)), Perplexity ≈ 65
- After 1,000 steps: Loss ≈ 2.5, Perplexity ≈ 12
- After 5,000 steps: Loss ≈ 1.6, Perplexity ≈ 5
- Excellent result: Loss < 1.2, Perplexity < 3.3
- Production GPT-2 on web text: Loss ≈ 3.2, Perplexity ≈ 24.5
LLM Size vs Hardware Comparison Table
This reference table helps you choose the right model size for your hardware, whether you’re building from scratch, fine-tuning, or running via Ollama.
| Model | Parameters | Min RAM/VRAM | Training From Scratch | Fine-Tune (LoRA) | Run (Inference) |
|---|---|---|---|---|---|
| NanoGPT (this guide) | 1–10M | 2GB RAM | ✅ CPU, minutes | N/A | ✅ Anywhere |
| DistilGPT-2 | 82M | 4GB RAM | ❌ Impractical | ✅ CPU (slow) | ✅ CPU fast |
| GPT-2 Small | 117M | 4GB RAM | ❌ Impractical | ✅ CPU/GPU | ✅ CPU fine |
| GPT-2 Medium | 345M | 8GB RAM | ❌ Impractical | ✅ GPU 8GB | ✅ CPU (slow) |
| LLaMA 3.2 (3B) | 3B | 8GB RAM | ❌ No | ✅ GPU 8GB+ | ✅ CPU/GPU |
| Mistral 7B / LLaMA 7B | 7B | 16GB RAM | ❌ No | ✅ GPU 8GB (QLoRA) | ✅ 16GB+ RAM |
| LLaMA 13B | 13B | 32GB RAM | ❌ No | ✅ GPU 24GB | ✅ 32GB RAM |
| LLaMA 70B | 70B | 64GB RAM | ❌ No | ❌ Multi-GPU | ⚠️ Very slow CPU |
Common Mistakes & How to Avoid Them
These are the mistakes that trip up 90% of beginners when building their first LLM. Learning these before you start saves days of debugging. They apply across the entire pipeline — from tokenization to training to evaluation.
If you fit the tokenizer only on training text, validation or test text may contain unseen characters → encoding errors or silently dropped characters.
✅ Fix: Fit the tokenizer on the ENTIRE dataset (train + val combined) before splitting.
Dropout layers remain active in training mode, adding randomness to validation loss estimates.
✅ Fix: Always call
model.eval() before evaluation and model.train() after.Training loss explodes to NaN or oscillates wildly. The model never converges.
✅ Fix: Start with lr=3e-4 for training from scratch, lr=2e-5 for fine-tuning. Always use warmup.
Without masking future tokens, the model “cheats” by looking ahead. It achieves zero training loss but generates gibberish.
✅ Fix: Always apply the lower-triangular causal mask in attention. Verify with a simple test: the model should NOT achieve <0.1 loss immediately.
Using a tiny eval batch gives noisy loss estimates that bounce all over the place.
✅ Fix: Average loss over 50+ validation batches for stable estimates.
A NanoGPT trained on Shakespeare will not answer questions, write code, or hold a conversation. It generates Shakespeare-like text. That’s it. And that’s fine for learning.
✅ Fix: Set correct expectations. Use Ollama + LLaMA 3B for practical AI tasks.
Most beginners jump straight to model architecture. In reality, 80% of LLM quality comes from data quality. A simple model trained on excellent, diverse, clean data beats a complex model on noisy data every time. Always spend more time on data than on the model itself.
Your 4-Week Learning Roadmap
Follow this structured path to go from zero to having a working local LLM and deep understanding of every component. Each week builds on the previous one. Start with tokenization fundamentals before anything else.
- Implement CharTokenizer from scratch — encode and decode a full book
- Run tiktoken demos — understand how GPT-2 sees different text types
- Implement BPE from scratch (the merge algorithm)
- Build the data pipeline: clean → filter → tokenize → batch
- Read: “Attention is All You Need” abstract + introduction
- Watch: Andrej Karpathy’s “Let’s Build GPT” on YouTube
- Implement each component — AttentionHead → MultiHeadAttention → Block → NanoGPT
- Verify shapes at each step (the test_model_components approach)
- Train on Shakespeare for 5,000 steps — watch loss fall from 4.17 to ~1.6
- Experiment with temperature and top-k in generation
- Try different model sizes — observe parameter vs loss tradeoffs
- Fine-tune DistilGPT-2 on your own Q&A dataset using HuggingFace Trainer
- Implement LoRALinear from scratch to understand the math
- Apply PEFT LoRA to GPT-2 and measure parameter reduction
- Set up Ollama — run LLaMA 3.2 3B locally
- Build a simple Python chatbot with your local Ollama model
- Explore quantization: understand GGUF, Q4, Q8 formats
- Set up LM Studio — compare different local models on your tasks
- Read about Flash Attention and why it matters for long context
- Learn about RAG (Retrieval Augmented Generation) — combine local LLM with your documents
- Explore DPO/RLHF at a conceptual level — how alignment works
- 🔗 Karpathy’s NanoGPT: github.com/karpathy/nanoGPT
- 🎥 Karpathy’s Zero to Hero series: youtube.com/karpathy
- 📖 HuggingFace NLP Course: huggingface.co/learn
- 🖥️ LLM Visualization (interactive): bbycroft.net/llm
- 🛠️ Ollama: ollama.ai
- 🛠️ LM Studio: lmstudio.ai
- 📄 Original paper: “Attention Is All You Need” (Vaswani et al., 2017)
Frequently Asked Questions
Can I really build an LLM from scratch on a CPU with 8GB RAM?
Yes — but with clear expectations. You can build and train a NanoGPT (1–10M parameters) on small datasets like Shakespeare on any modern CPU. Training 5,000 steps takes 30–90 minutes. The result genuinely learns to generate Shakespeare-like text and teaches you every fundamental concept in LLMs. For practical AI tasks, pair this learning with running a 3B model via Ollama, which works on 8GB RAM. See the full hardware requirements section for details.
What is the difference between pre-training and fine-tuning an LLM?
Pre-training means training a model from randomly initialized weights on massive internet-scale text (trillions of tokens). This is what creates GPT-4, LLaMA, and Mistral — it costs millions of dollars and requires thousands of GPUs. Fine-tuning means taking one of those pre-trained models and continuing training on a much smaller, specialized dataset to adapt it to your specific task or domain. Fine-tuning can be done in hours on a single GPU. For almost all practical applications, fine-tuning a small pre-trained model is the correct approach. See the fine-tuning section for a complete implementation.
What is tokenization and why does it matter so much?
Tokenization converts raw text into numbers (tokens) that a neural network can process. It matters enormously because it determines the vocabulary size (affects model memory and speed), sequence length (affects context window efficiency), and how well the model handles different text types. Code, math, and non-English text can be extremely expensive in tokens compared to standard English prose. A poorly chosen tokenization strategy can waste model capacity and degrade performance significantly. See the complete tokenization section with three full implementations.
What is LoRA and should I use it?
LoRA (Low-Rank Adaptation) adds small trainable matrices to frozen attention layers in a pre-trained model. Instead of updating all parameters (expensive), you only train the LoRA matrices — typically 0.1%–1% of total parameters. The result is comparable to full fine-tuning but uses 10–100× less memory and compute. Yes, you should use it — it is the standard approach for fine-tuning 7B+ parameter models on consumer hardware. Combined with 4-bit quantization (QLoRA), you can fine-tune a 7B model on a single 8GB GPU. See the full LoRA section with math and code.
How do I run a capable AI locally without training anything?
Use Ollama or LM Studio to download and run quantized open-source models. With 8GB RAM, run ollama run llama3.2:3b — this gives you a capable 3B parameter model conversationally within minutes. With 16GB RAM, LLaMA 7B or Mistral 7B models work well. These tools handle all quantization, memory management, and provide OpenAI-compatible APIs so you can integrate them with Python easily. See the full setup guide in the running locally section.
What does perplexity mean and what is a good score?
Perplexity is exp(cross-entropy loss) and measures how “surprised” the model is by text. Lower is better. A randomly initialized model has perplexity equal to its vocabulary size (65 for Shakespeare char-level). After training NanoGPT well, you can reach perplexity of 3–5, meaning the model is choosing from an effective vocabulary of 3–5 candidates at each step. Production models like GPT-2 achieve perplexity around 18–25 on web text. See the full interpretation guide in the evaluation section.
What is the minimum data I need to fine-tune a model?
For simple style or domain adaptation, as few as 100–500 high-quality examples can noticeably change model behavior. For instruction following (Q&A chatbot style), 1,000–10,000 instruction-response pairs are typical. For full domain knowledge acquisition, 100,000+ examples produce the best results. Quality always matters more than quantity — 500 carefully written, diverse, high-quality examples outperform 10,000 repetitive or noisy ones. Always apply the data cleaning pipeline before training.
Is training an LLM locally legal? Are there copyright concerns?
Building your own NanoGPT and training it on your own text is completely legal. Using publicly available datasets like Wikipedia, Project Gutenberg, or HuggingFace’s open datasets is legal for research and educational purposes. Be careful with: scraping commercial websites (check terms of service), using copyrighted books without permission for commercial models, and training on private or personal data. For commercial products, consult the license of your base model — LLaMA 3, Mistral, and Falcon all have specific usage licenses that restrict certain commercial applications. When in doubt, use datasets with clear open licenses like Common Crawl or The Pile subsets.
My training loss is not decreasing. What should I do?
First, verify the loss at initialization — it should be approximately ln(vocab_size). If it is already much lower, your data may be leaking into the model. If the loss truly will not budge, check these in order: (1) verify your learning rate is not too high or too low — try 3e-4; (2) print several random training batches to ensure they are genuinely different; (3) confirm model.train() is called; (4) check for NaN in parameters with the health check code; (5) verify your causal mask is applied — without it, the model cheats and loss drops instantly to near zero but generation is gibberish. See the full common mistakes section for a complete debugging guide.
Should I start with character-level or BPE tokenization for my project?
For learning and building NanoGPT: always start with character-level. It is simple, has no dependencies, and teaches you the fundamentals clearly. For any real application or fine-tuning work: use BPE via tiktoken or the HuggingFace tokenizer that comes with your chosen base model. Never mix tokenizers — if you use a GPT-2 model, use the GPT-2 tokenizer. If you build from scratch for production use, train a SentencePiece or tiktoken BPE tokenizer on your full domain corpus. The tokenization section covers all three approaches with complete code.
- Learn: Run the tokenization demos with your own text first
- Build: Implement NanoGPT component by component, test each shape
- Train: Run the training loop on Shakespeare — watch loss fall
- Practical: Fine-tune DistilGPT-2 on your domain with HuggingFace
- Efficient: Apply LoRA for larger models on limited hardware
- Use now: Install Ollama, run LLaMA 3B today — zero training needed
Last updated: 2026 | Content based on PyTorch 2.x, HuggingFace Transformers 4.x, PEFT 0.x, Ollama 0.x | Always check official documentation for latest API changes.