
AI Agents are intelligent systems designed with a goal, agenda, and task that use tools, reasoning, and intelligence to autonomously plan, make decisions, and execute actions. An AI agent follows a continuous workflow—perceive → reason → plan → use tools → execute → evaluate—adapting its actions and decisions to achieve the desired goal.
Building an AI agent in the Claude Console provides a practical way to turn Claude into a purpose-built AI assistant designed for a specific task, business process, or workflow. Instead of simply asking an AI model questions, you can configure an agent with a defined purpose, instructions, tools, and operating behavior so it can work through tasks more systematically.
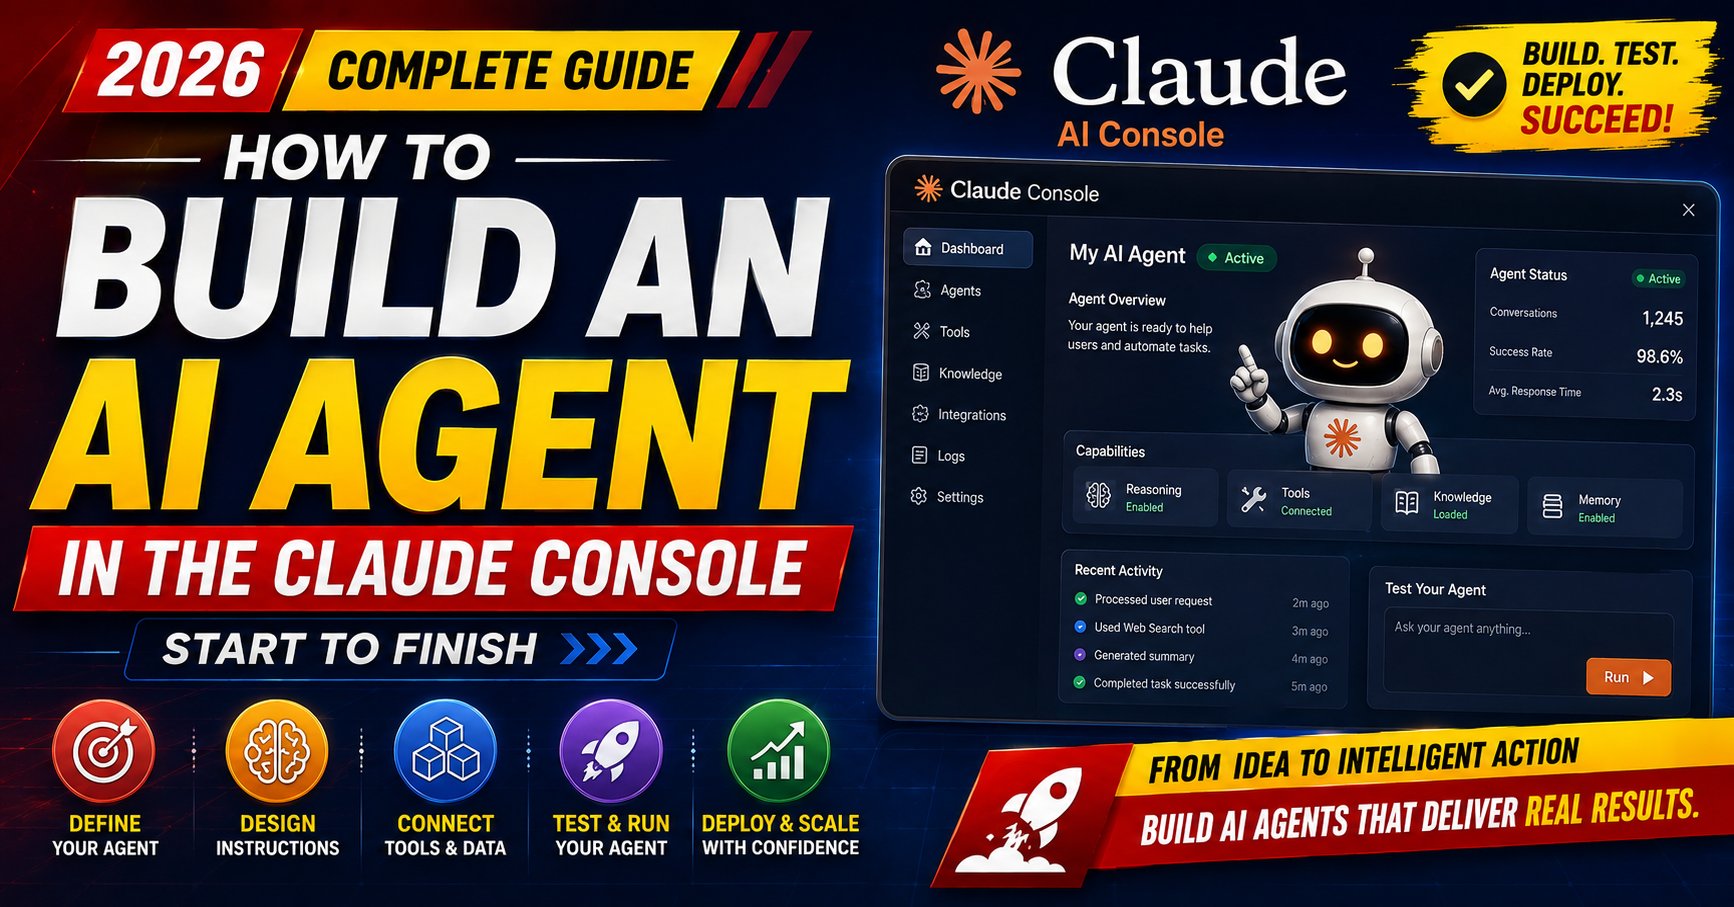
In this step-by-step guide to building an AI agent in Claude Console, you will learn how to create your first agent from start to finish, understand the key configuration fields, define its instructions and capabilities, and see how each setting affects the agent once it is running.
This is a hands-on guide to the Claude Console, covering the agent setup process, configuration options, important design decisions, and the practical workflow behind creating a useful AI agent. Whether you are building an AI assistant for business support, research, automation, customer service, content creation, or internal workflows, the same core principles can be applied to create a more capable and task-focused agent.
Hands-on walkthrough: Explore the Claude Console agent workspace at platform.claude.com/workspaces/default/agents— including the major configuration fields, the decisions behind each setting, and what happens after your AI agent is created and running.
In this guide
Why AI Agents
The Agents page is where you build the reusable configuration your sessions run — not a one-off prompt, but a versioned resource you can reference by ID forever.
An agent bundles five things: the model, the system prompt, its tools (built-in, MCP, or custom), any skills it can draw on, and — if it’s a coordinator — a list of other agents it can delegate to. Where it runs and what task it does today are decided later, by an Environment and a Session.
Before You Start
- Console access with permission to create resources in the active workspace —
/workspaces/default/agentsis scoped to whichever workspace you’re in. - A one-sentence job description for the agent, written before you open the form.
- A model decision — the Console only accepts Claude 4.5 or later.
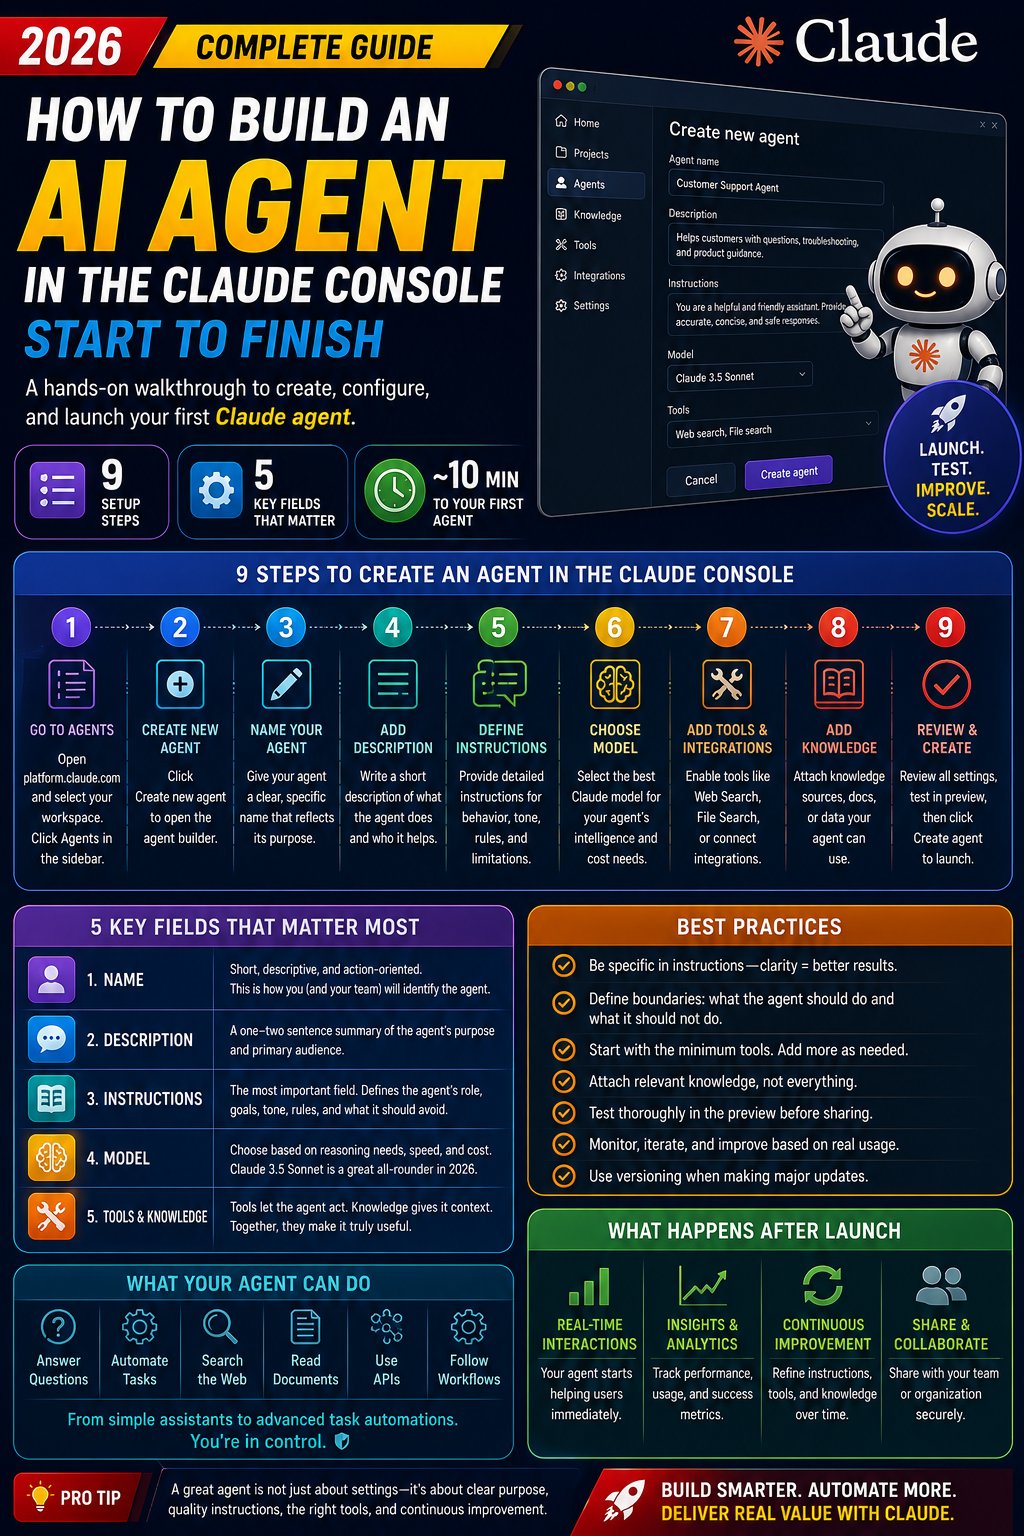
How to Build an AI Agent in the Claude Console: Infographic Explained
This infographic provides a visual, step-by-step overview of how to create an AI agent in the Claude Console in 2026. It highlights the complete setup journey, from opening the Agents workspace and creating a new agent to defining its instructions, selecting a model, adding tools and knowledge, testing the configuration, and launching the agent.
At a Glance: What the Infographic Covers
The guide is organized around three key numbers: 9 setup steps, 5 configuration fields that matter most, and approximately 10 minutes to create a first agent. The actual time can vary depending on how much instruction, knowledge, testing, and tool configuration your agent requires.
The overall principle is simple: a useful AI agent is not created merely by selecting a model. Its effectiveness depends on the combination of a clear purpose, detailed instructions, appropriate tools, relevant knowledge, testing, and continuous improvement.
The 9 Steps to Create an AI Agent
- Go to Agents: Open the Claude Console and navigate to the Agents area of the workspace.
- Create a New Agent: Start the agent creation process by selecting the option to create a new agent.
- Name Your Agent: Choose a clear and descriptive name that immediately communicates the agent’s purpose.
- Add a Description: Write a concise explanation of what the agent does, who it is designed to help, and what problem it solves.
- Define Instructions: Provide the agent with detailed guidance about its role, behavior, responsibilities, rules, limitations, and expected responses.
- Choose a Model: Select an appropriate Claude model according to the agent’s reasoning requirements, performance needs, speed, and cost considerations.
- Add Tools and Integrations: Give the agent access to the capabilities it actually needs, such as search, external services, or other supported integrations.
- Add Knowledge: Attach relevant documents, information, or other knowledge sources that the agent needs to perform its intended tasks.
- Review and Create: Check the configuration, test the agent where available, review its behavior, and then create or launch the agent.
The 5 Key Configuration Areas
The infographic emphasizes five areas that have a particularly important effect on how an agent is defined and used.
1. Agent Name
The name should be short, recognizable, and closely related to the agent’s purpose. A good name makes it easier for users and team members to understand what the agent is designed to do.
2. Description
The description provides a quick explanation of the agent’s purpose and intended audience. Keep it concise and specific rather than filling it with general marketing language.
3. Instructions
Instructions are one of the most important parts of the configuration. They establish the agent’s role, goals, behavior, boundaries, response style, and rules. Clear instructions can reduce ambiguity and make the agent’s behavior more consistent.
4. Model
The model determines the underlying AI capability used by the agent. The infographic below recommends choosing according to the required reasoning capability, speed, and cost rather than automatically selecting the most powerful option for every task.
5. Tools and Knowledge
Tools give the agent capabilities, while knowledge provides information and context. The infographic recommends using relevant tools and knowledge rather than adding everything available. A focused configuration can make an agent easier to understand, test, and manage.
Best Practices Highlighted in the Infographic
- Be specific in your instructions: Clearly describe what the agent should do.
- Define boundaries: Explain what the agent should and should not do.
- Start with the minimum tools: Add capabilities only when they are useful for the agent’s purpose.
- Use relevant knowledge: Provide information that directly supports the agent’s tasks.
- Test before sharing: Check how the agent responds to realistic requests.
- Monitor and improve: Refine instructions and configuration based on actual usage.
- Use versioning where appropriate: Keep track of important configuration changes so improvements can be reviewed and understood.
Types of AI Agents
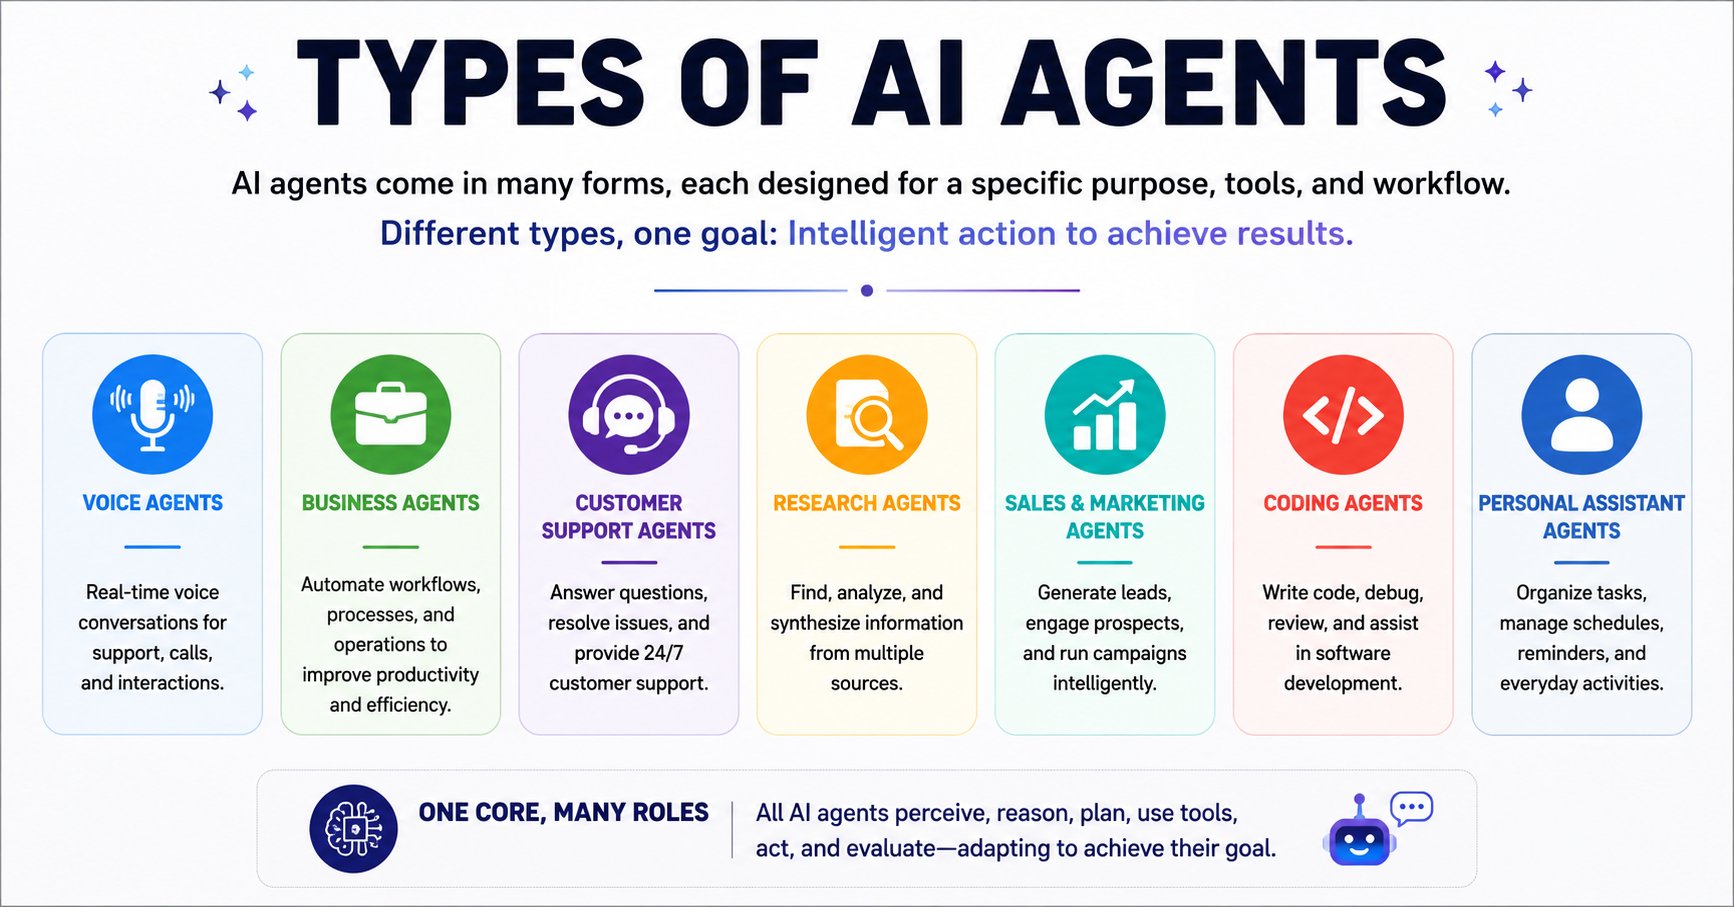
AI agents can be designed for different roles depending on their goal, tasks, tools, and operating environment. Common types include AI Voice Agents for real-time conversations and phone support, AI Business Agents for automating workflows and operations, Customer Support Agents for answering questions and resolving issues, Research Agents for finding, analyzing, and synthesizing information, Sales & Marketing Agents for lead generation and campaign activities, Coding Agents for software development and debugging, and Personal Assistant Agents for organizing information, schedules, and everyday tasks.
What an AI Agent Can Do
The infographic below presents several broad capabilities that an appropriately configured AI agent can support. These include answering questions, automating tasks, searching the web, working with documents, using APIs or integrations, and following defined workflows.
The important point is that these capabilities depend on the tools, permissions, knowledge, instructions, and platform features available to the particular agent. Not every agent needs every capability.
What Happens After Launch?
Creating the agent is only the beginning. The infographic divides the post-launch process into four areas: real-time interactions, insights and analytics, continuous improvement, and sharing or collaboration.
Real-Time Interactions
Once available to users, the agent can begin handling the tasks for which it was configured.
Insights and Analytics
Usage and performance information can help identify where the agent performs well and where users encounter problems.
Continuous Improvement
Agent instructions, knowledge, tools, and workflows can be refined as real-world usage reveals new requirements or weaknesses.
Share and Collaborate
An agent can become part of a broader team workflow when it is appropriately configured for sharing and collaboration.
The Main Lessons
The central message is that a great AI agent is not simply about choosing settings. Its usefulness comes from combining a clear purpose with high-quality instructions, appropriate tools, relevant knowledge, careful testing, and continuous improvement.
Instead of trying to build an agent that can do everything, start with one clearly defined problem. Give the agent the information and capabilities necessary to solve that problem, establish clear boundaries, test realistic scenarios, and improve the configuration based on actual results.
Simple Agentic AI Workflow to Remember
Define the purpose → Create the agent → Name it → Describe it → Write instructions → Select the model → Add tools → Add knowledge → Test → Launch → Monitor → Improve.
This workflow provides a practical foundation for moving from a basic Claude Console configuration to a more useful and reliable AI agent.
Step-by-Step: Creating an Agent
1. Open the Agents page and start a new agent
Go to platform.claude.com/workspaces/default/agents and click Create agent. Nothing is saved until you submit the form.
2. Name the agent
Give it a human-readable name — required, and how you’ll find it in a list of dozens later. Use the job, not the model: “Invoice Extractor,” not “Opus Agent 1.”
3. Choose the model and its settings
Pick a model — Claude 4.5 or newer. Optionally set speed (fast mode, on supported Opus models), effort (low through max), and inference geo (us or global, for data-residency needs).
Higher effort levels generally cost more and respond slower for more careful reasoning — reserve high/xhigh for judgment calls, not high-volume classification.
4. Write the system prompt
This is the agent’s persona and standing behavior — not the task. Keep task instructions (“summarize this ticket”) out of the system prompt; they belong in the session’s opening message.
You are a support agent. Use the retrieve tool to search
our knowledge base before answering. If you're not confident
in the answer, say: "I'll connect you with a human agent."
Always cite the source document.
5. Attach tools
Combine pre-built agent tools (bash, file read/write, web search, web fetch, code execution), MCP tools from any connected server, and custom tools you define yourself.
Each tool has its own permission policy (for example, always_allow vs. requiring approval per call) — review this before attaching anything that writes data or spends money.
6. Add skills (optional)
Skills are reusable, filesystem-based domain knowledge any agent can attach, instead of copy-pasting the same instructions into several system prompts.
7. Configure delegation (optional)
If this agent should coordinate other agents rather than do the work itself, list which agent IDs it can delegate to under multiagent. Skip this for a first agent.
8. Add a description and metadata (optional)
A free-text description for humans skimming the list, plus your own metadata key–value pairs for tracking — team owner, cost center, and so on.
9. Save — and get version 1
Saving creates the agent with version: 1. Unset fields get their defaults, and the response gives you an id you’ll reference from every session.
Equivalent via the CLI, for a deploy pipeline:
agent=$(ant beta:agents create \
  --name "Support Agent" \
  --model '{id: claude-sonnet-5}' \
  --system "You are a helpful support agent." \
  --tool '{type: agent_toolset_20260401}' \
  --format json)

AGENT_ID=$(jq -r '.id' <<< "$agent")
Config Fields, Explained
| Field | Required | What it controls |
|---|---|---|
name |
Yes | Human-readable label shown in the agents list. |
model |
Yes | Which Claude model runs the agent, plus optional speed, effort, and inference-geo settings. |
system |
No | Standing behavior and persona — distinct from the per-session user message describing the task. |
tools |
No | Pre-built agent tools, MCP tools, and custom tools the agent can call. |
mcp_servers |
No | External MCP servers providing standardized third-party capabilities. |
skills |
No | Reusable, filesystem-based domain context, disclosed progressively. |
multiagent |
No | A roster of agents this one can delegate to, if it’s a coordinator. |
description / metadata |
No | Human-facing notes and your own tags — no effect on behavior. |
Updating any of these later creates a new version automatically — array fields (tools, mcp_servers, skills) are fully replaced on update, while metadata merges key by key.
What Happens After You Save
An agent by itself doesn’t run anything — it’s a definition, not a process. Two more resources make it usable:
- Create an Environment — where the agent’s tools execute: a cloud sandbox for a fast start, or a self-hosted sandbox (Cloudflare, Daytona, Modal, Vercel, or your own infrastructure) if your work needs to stay inside your own network.
- Start a Session — a running instance referencing your agent’s ID and environment’s ID. This is what you send messages to, and where Events — every message, tool call, and result — are logged and streamed back.
Building a Claude AI Agent – Step by Step Guide
Why Use Managed Agents Instead of Calling the API Directly
Reusable, not repeated
Define the model, prompt, and tools once. Every session references an ID — no re-sending the same config on every call.
Versioned by default
Every change bumps a version number automatically, so you can see what changed and when.
No agent loop to build
Tool execution, context management, retries, and error recovery are handled for you.
Sandboxed tool execution
Tools run in an isolated cloud or self-hosted environment, so a bad tool call can’t reach beyond it.
Full event history
Every message and tool call is persisted server-side — useful for debugging and audits.
Room to grow
The same model supports scheduled runs, multiagent delegation, and self-evaluating outcomes later.
Common Mistakes When Setting Up an Agent
tools, mcp_servers, or skills replaces the entire list — resend the full set, not a diff.FAQ
Does creating an agent start it running?
No. An agent is a saved configuration. Nothing executes until you create an Environment and start a Session that references it.
Can I edit an agent after I’ve already used it in sessions?
Yes — updating an agent creates a new version, and existing sessions keep running under whichever version they started with.
What’s the difference between the system prompt and a skill?
The system prompt is always loaded and defines the agent’s core persona. Skills are disclosed progressively and are meant to be reused across multiple agents.
Can I delete an agent?
Agents are archived, not deleted. Archiving makes an agent permanently read-only and can’t be undone.
Do I need an MCP server to create a useful agent?
No. The built-in agent toolset covers plenty of tasks on its own. Add MCP servers when the agent needs to reach something specific to your business.